

🍯 The Jelly Bottling Hack
Foam-Free Jelly Every Time!
📌 In This Article
🍯 The Jelly Story
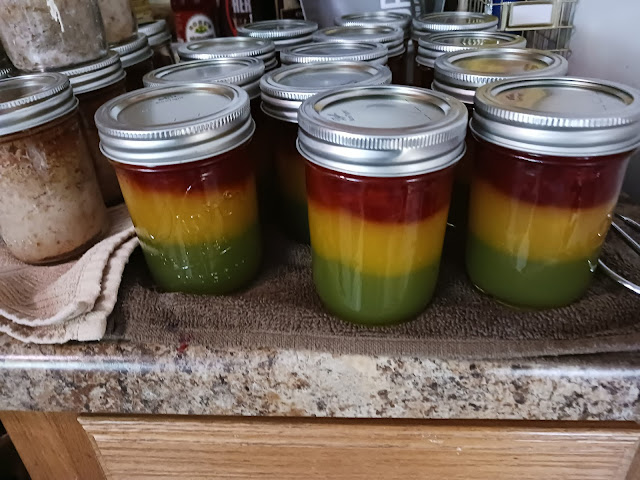
"Hello canning friends. I've recently discovered a hack when bottling my jelly that is too good to not pass along. I bottle about 150 jars of jelly a week, so anything to make the process easier is life changing!"
If you make a lot of jelly, you know the struggle. Foam. It rises to the top of the pot, and you spend forever trying to skim it all off. Even then, some foam remains, and it ends up in your jars, making your jelly look cloudy and unprofessional.
For someone like me who bottles 150 jars of jelly a week, anything that makes the process easier is life-changing. And this hack? It's a game-changer.
💬 The struggle: "One of my recipes gets especially foamy and I was spending a lot of time trying to skim off all the foam only to have some remaining."
💡 The Hack – An Oil Separator!
The Oil Separator Hack
🫙"I bought this oil separator from Amazon that dispenses from the bottom. Foam all rises to the top and doesn't go into my jars!"
Dispenses from the Bottom
Foam stays on top
Button Release
Easier on arthritis
Controlled Flow
No bubbles from pouring
Foam rises to the top, jelly dispenses from the bottom = perfect jars every time!
💬 The solution: "I bought this oil separator from Amazon that dispenses from the bottom. Foam all rises to the top and doesn't go into my jars, PLUS the button to release is way easier on my arthritis than ladeling into jars, AND you can control the flow rate so well that there are no bubbles from pouring too quickly."
📦 Supplies You Need
🛠️ The Hack Tool
- 🫗 Oil Separator – Available on Amazon, dispenses from the bottom
- 🔘 Bottom-Release Button – For easy dispensing
- 🎛️ Flow Control Valve – For controlled pouring
🍯 For the Jelly
- 🍓 Your favorite jelly recipe – Fruit juice, sugar, pectin
- 🫙 Canning jars – Half-pints or pints
- 🧴 Lids and rings – New lids for best results
- 🔥 Water bath canner
💡 Pro tip: "The oil separator is a small investment that pays for itself in time saved!"
📝 Step-by-Step Instructions
Step 1 – Make Your Jelly
- Prepare your favorite jelly recipe as usual.
- Bring the mixture to a rolling boil and cook according to the recipe.
- Remove from heat.
💡 Pro tip: "Use whatever jelly recipe you love — this hack works for all of them!"
Step 2 – Let the Foam Rise
- Let the jelly sit for a few minutes.
- The foam will naturally rise to the top.
- No need to skim!
💡 Pro tip: "The foam rises to the top and stays there — the oil separator does the rest!"
Step 3 – Pour into the Oil Separator
- Carefully pour the hot jelly into the oil separator.
- The foam will stay at the top.
- The jelly will settle below.
⚠️ Important: "Use caution when pouring hot jelly — it can burn!"
Step 4 – Dispense from the Bottom
- Place your hot jar under the spout.
- Press the bottom-release button to dispense the jelly.
- The foam stays in the separator — only clear jelly goes into your jars!
- Control the flow rate to avoid bubbles.
💡 Pro tip: "The button release is way easier on my arthritis than ladeling!"
Step 5 – Seal and Process
- Wipe rims clean with a damp cloth.
- Add lids and rings — finger-tight.
- Process in a boiling water bath according to your jelly recipe.
💡 Pro tip: "No bubbles from pouring too quickly — the flow control makes all the difference!"
Step 6 – Cool and Store
- Remove jars and cool on a dishtowel.
- Check seals after 24 hours.
- Store in a cool, dark place.
💡 Pro tip: "Listen for that satisfying 'pop' — that's the sound of a perfect seal!"
🥫 How to Store
- 🏠 Pantry: Up to 1 year in a cool, dark place
- 🧊 Refrigerator after opening: Use within 1 month
- 🍯 Clean-up: The oil separator rinses clean easily
💡 Pro tip: "Label your jars with the date so you know when they were canned."
💡 Pro Tips
- 🫗 Use an oil separator: It separates foam from jelly perfectly.
- 🔘 Bottom-release button: Easier on hands than ladeling.
- 🎛️ Control the flow: Prevents bubbles from pouring too quickly.
- ⏱️ Save time: No more skimming foam!
- 🫙 Perfect jars: Clear jelly every time.
- 💪 Arthritis-friendly: The button release is gentle on hands.
- 🏷️ Label everything: Date and contents on every jar.
💡 Pro tip: "I bottle about 150 jars of jelly a week, so anything to make the process easier is life changing!"
❓ Frequently Asked Questions
❓ What is an oil separator?
It's a kitchen tool designed to separate oil from other liquids, but it works perfectly for separating foam from jelly!
❓ Where can I buy one?
Amazon carries several options — search for "oil separator with bottom release."
❓ Does this work for all jellies?
Yes! It works for any jelly or jam recipe that gets foamy.
❓ Is it safe for hot jelly?
Yes, oil separators are typically heat-resistant. Check the manufacturer's instructions.
❓ How do I clean it?
Most oil separators rinse clean with warm soapy water.
❓ Can I use this for other things?
Yes! It's also great for dispensing sauces, dressings, and more.
❓ Is it worth the investment?
YES! If you make a lot of jelly, it pays for itself in time saved.
❓ Does it really eliminate all the foam?
Yes! The foam rises to the top and stays there while the jelly dispenses from the bottom.
❓ Is this arthritis-friendly?
Yes! The button release is much easier on hands than ladeling.
❓ Will I ever go back to ladeling?
Probably not! This hack is a game-changer!
📄 Printable Recipe Card
╔═══════════════════════════════════════════════════════════════════════╗
║              THE JELLY BOTTLING HACK                                ║
║          Foam-Free Jelly Every Time!                                ║
╚═══════════════════════════════════════════════════════════════════════╝

WHAT YOU NEED:
- Oil separator with bottom release (Amazon)
- Your favorite jelly recipe
- Canning jars, lids, and rings
- Water bath canner

════════════════════════════════════════════════════════════════════════
                         INSTRUCTIONS
════════════════════════════════════════════════════════════════════════

1. Make your jelly as usual.

2. Let it sit so foam rises to the top.

3. Pour jelly into the oil separator.

4. Place hot jar under the spout.

5. Press the bottom-release button to dispense.
   Foam stays on top — only clear jelly goes into jars!

6. Wipe rims, add lids and rings.

7. Process in water bath according to your recipe.

8. Cool, check seals, and store.

════════════════════════════════════════════════════════════════════════
                         BENEFITS
════════════════════════════════════════════════════════════════════════

✓ No more skimming foam
✓ Clear jelly every time
✓ Easier on arthritis
✓ Controlled flow rate
✓ No bubbles from pouring
✓ Saves hours of time

════════════════════════════════════════════════════════════════════════
                    GAME-CHANGER! 🍯
════════════════════════════════════════════════════════════════════════

"I've recently discovered a hack when bottling my
 jelly that is too good to not pass along. I bottle
 about 150 jars of jelly a week, so anything to make
 the process easier is life changing!" ❤️
© CanningRebels — The Jelly Bottling Hack







Comments