
Flour That Stands the Test of Time: A Comprehensive Guide to Long-Term Storage and Preservation

Did you know that with proper storage techniques, you can extend the shelf life of flour up to an impressive 15 years?
Flour, a pantry staple in many households, is susceptible to pests and degradation over time. However, by following a few simple instructions, you can ensure that your flour remains fresh, bug-free, and ready to use whenever you need it.
1. Freezing to Eliminate Bugs:
It might come as a surprise, but flour can indeed harbor tiny bugs such as weevils. To prevent any unwanted visitors from spoiling your flour, start by freezing it. Purchase your flour in sealed bags from the store and place them in the freezer overnight. The cold temperatures will kill any bugs or eggs that might be present.
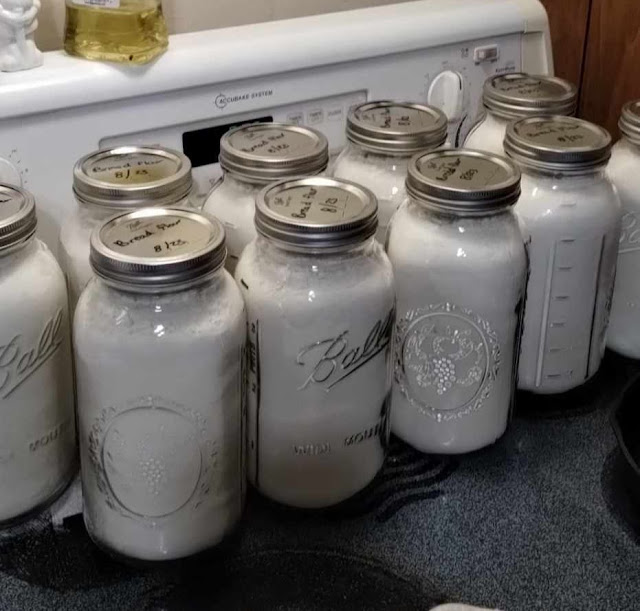
2. Preparing Jars for Storage:
Choose clean, airtight glass jars for storing your flour. Mason jars or other similar containers with tight-fitting lids work well. Before filling the jars, ensure that they are thoroughly cleaned. Wash the jars, lids, and rims with warm, soapy water, and rinse them well. There is no need to sanitize them, but it's essential to dry them thoroughly to prevent moisture buildup.
3. Filling and Sealing Jars:
Once your jars are clean and dry, it's time to fill them with flour. Transfer the frozen flour from the bags into the jars, leaving some headspace to accommodate the oxygen absorbers. Oxygen absorbers help maintain the freshness of the flour by removing oxygen, which can lead to spoilage.
Add one or two 700cc oxygen absorbers to each jar, depending on the jar's size and the amount of flour you are storing. These absorbers can be purchased from suppliers like Harvest Right. Before sealing the jars, wipe the rims clean to ensure there is no residual flour that could interfere with a tight seal.
4. Vacuum Sealing Option:
For an extra layer of protection, consider using a vacuum sealer lid attachment. These attachments can remove oxygen from the jar and provide an airtight seal. Follow the instructions provided with your vacuum sealer to properly attach the lid and remove the oxygen.
5. Checking for Proper Sealing:
After sealing the jars, it's important to ensure they have a tight seal. Leave the jars undisturbed for a few hours. If you notice that a jar hasn't sealed properly, remove the lid, wipe the rim clean again, and try sealing it once more. A tight seal is essential for long-term storage and preserving the quality of your flour.
By following these instructions, you can confidently store flour for an extended period, knowing it will remain fresh and free from pests. Properly stored flour can be a valuable asset in times of emergency or as a convenient pantry staple when needed.
Remember to label your jars with the date of storage, as this will help you keep track of the flour's age. Additionally, store the jars in a cool, dark place away from direct sunlight and moisture, as these factors can accelerate the deterioration of flour.
With a little effort in proper storage and preservation, you can have peace of mind knowing that your flour will remain usable for years to come. So, stock up on flour, follow these guidelines, and enjoy the convenience and security of having a long-lasting supply at your fingertips.


Comments
How can you do this preserving without a vacuum sealer lid thing?
ReplyDeleteCan you use self rising flour?
ReplyDeleteCan you do this for ruce
ReplyDeleteWhat is the sealing process though? Is it just oxygen absorbers and screw the lid on? How do you test for a seal?
ReplyDelete