
Milk Magic: Unlocking the Wonders of Canning Milk for Creamy Culinary Creations.

Canned milk is a versatile pantry staple that can be used in a variety of recipes, from creamy desserts to rich sauces and comforting beverages.
we'll explore the art of canning milk, allowing you to enjoy the convenience and long shelf life of this dairy goodness. Whether you prefer whole milk, evaporated milk, or sweetened condensed milk, the process of canning milk is straightforward and rewarding. Join us as we dive into the steps of canning milk and discover the delightful possibilities it brings to your culinary repertoire.
Creamy Delights: A Guide to Canning Milk for Versatile and Long-lasting Dairy Goodness
Canning is not just restricted to fruits and vegetables; it extends to dairy products as well. Canning milk offers numerous benefits, including extended shelf life, convenience, and the ability to have milk readily available for a variety of culinary creations. In this article, we'll walk you through the process of canning milk, whether you prefer whole milk, evaporated milk, or sweetened condensed milk. Get ready to unlock the potential of this versatile dairy product and elevate your recipes with the creamy goodness of canned milk.
Recipe: Canning Milk
Ingredients:
- - Fresh milk (whole milk, evaporated milk, or sweetened condensed milk)
- Canning Supplies:
- - Canning jars with lids and bands
- - Water bath canner or pressure canner
- - Jar lifter
- - Funnel
- - Ladle
- - Clean towels
Instructions:
1. Choose the Type of Milk:
- Decide on the type of milk you would like to can: whole milk, evaporated milk, or sweetened condensed milk. Each type has its own unique applications and flavors.
2. Sterilize the Canning Jars and Lids:
- Wash the canning jars, lids, and bands with warm, soapy water.
- Place them in a large pot filled with water and bring it to a boil.
- Let the jars, lids, and bands boil for 10 minutes to sterilize them.
- Turn off the heat and keep the jars, lids, and bands in the hot water until ready to use.
3. Prepare the Milk:
- Heat the milk gently in a large pot, ensuring it does not boil. Stir occasionally to prevent scorching.
- If you're making evaporated milk or sweetened condensed milk, follow specific recipes for the desired consistency and sweetness.
4. Fill the Canning Jars:
- Using a jar lifter and a funnel, carefully transfer the hot milk into the sterilized jars, leaving about 1 inch of headspace at the top.
- Remove any air bubbles by running a clean utensil along the sides of the jar.
- Wipe the rims of the jars with a clean, damp towel to remove any milk residue.
5. Seal and Process the Jars:
- Place the sterilized lids on top of each jar and secure them with the bands, but do not overtighten.
- If using a water bath canner, carefully place the filled jars into the canner and ensure they are submerged in water by at least 1 inch. Process the jars according to the recommended processing time for your altitude.
- If using a pressure canner, follow the manufacturer's instructions for processing time and pressure.
6. Cool and Store:
- Once the processing time is complete, turn off the heat and allow the canner to cool naturally.
- Once the canner is cool, remove the jars using a jar lifter and place them on a towel-lined countertop.
- Let the jars cool completely. You may hear popping sounds as the lids seal.
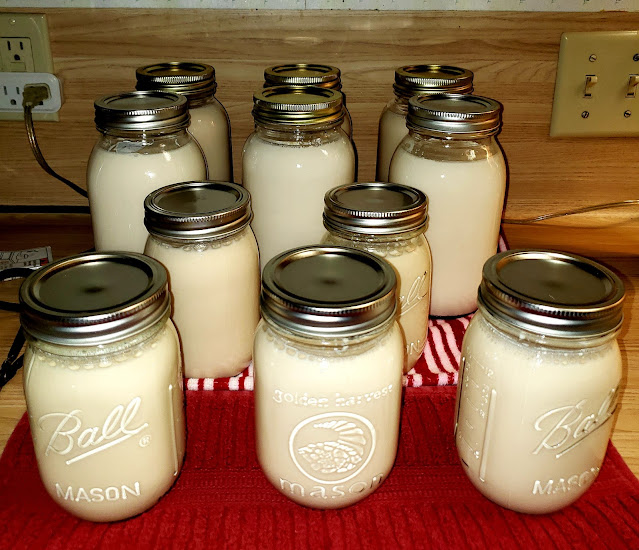
7. Label and Enjoy:
- Once the jars are completely cool, label them with the date and contents.
- Store the canned milk in a cool, dark place.
- To use the canned milk, simply open a jar and use it in your desired recipe, whether it's a creamy dessert, a luscious sauce, or a comforting beverage.
Canning milk opens up a world of culinary possibilities, providing you with a convenient and long-lasting supply of dairy goodness.
Whether you choose to can whole milk, evaporated milk, or sweetened condensed milk, the process is simple and rewarding. With your pantry stocked with canned milk, you'll have the flexibility to create creamy and decadent dishes whenever inspiration strikes. So, embrace the art of canning and elevate your recipes with the creamy delights that canned milk brings.


Comments
would like to know the length of time to process the milk?
ReplyDeletePlease don't do this, milk is a protein and if you were going to can it, it needs to be in a pressure canner but it is also low acid so will grow botulism. Please do not follow this recipe, do your research first!!
ReplyDeleteThank you for this info!
DeleteNever heard of canning milk! Is it safe to do this?
ReplyDeleteIv been canning milk for several years. Cold canner cold milk , pressure to 10 lb. Turn off burner and let cool completely. Open canner let set , check deals label and date. Last until it's used up
DeleteWe can cows milk every week and have never had a problem with canning or anyone getting sick. You can do this as long as you do right.
DeleteWe can in 1/2 pints in a pressure canner, we get our gage to 10 lb pressure once it gets to 10 lbs we shit canner off let it sit and come down to zero on its own. Take jars out and wait for them to seal. We leave all night on table, then take ring off wipe jars down and put in dark area or our closet.
so you tell us everytning we need to know except how long to can it. Makes no sense to me.
ReplyDeleteBecause it is not an approved process of preserving milk. They want no liability when someone gets sick and or dies.
ReplyDeletejust how many people do you know that have gotten sick or even worse died from botulism? I suspect zero
DeleteI have tried more than once to can milk and it always clabbers. I gave up and ordered shelf stable from dollar tree. A case online
ReplyDeleteAlso would like to know your canning time. You say "recommended time" for the canner. That doesn't exist. How long do YOU can, by which method? I'd like to try this, but would prefer to not ruin the milk.
ReplyDeleteYou may as well have just written "you can can milk". Your lengthy post didn't describe anything more than that. Some of your other posts seem interesting though.
ReplyDelete