


🥛 The Art of Canning Milk
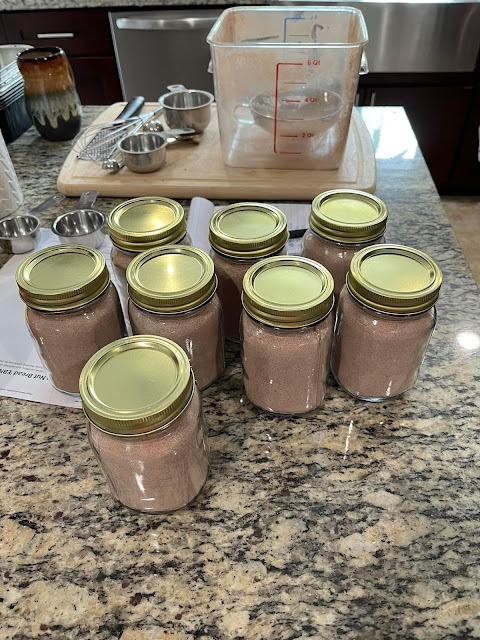
Three Gallons of Milk Turned into 2% and Half & Half!
📌 In This Article
🥛 The Milk Canning Story
"Three gallons of milk turned into 2% and 1/2 and 1/2! I love canning milk!" 🥛✨
Every homesteader knows the feeling of having more milk than they can use before it spoils. That's where the art of pressure canning milk comes in—a method that transforms fresh milk into shelf-stable jars that can sit on your pantry shelf for months.
This recipe turns three gallons of milk into a stockpile of preserved goodness. Whether you're using store-bought milk or fresh from your own dairy animals, this Rebel Canning method helps reduce waste and ensures you always have milk on hand [citation:10][citation:2].
💬 Why can milk? "Nothing is worse than thinking you have milk and then finding out you don't. This will help fix that. Also it will save you roughly $1 a can." [citation:5]
⚠️ Important Safety Information
⚠️ Read This Before You Start
This is a "Rebel Canning" method and is NOT an approved USDA practice. [citation:1][citation:4]
The USDA explicitly states: "There are no established safe procedures for canning dairy products." [citation:1]
The hazards include:
- Milk and butter are low-acid products that "support the outgrowth of C. botulinum and toxin formation in a sealed jar at room temperature." [citation:1]
- Fats can protect botulism spores and toxins from heat during the canning process [citation:1].
- Overheating milk causes proteins to drop out of suspension, making it separate [citation:1].
If you choose to use this method, you do so at your own risk. Always inspect jars before consuming—look for bulging lids, off odors, or signs of spoilage [citation:4].
📦 Ingredients & Equipment
What You'll Need
- 🥛 Fresh milk – 2%, whole, half & half, or skim (cold from the refrigerator) [citation:2]
- 🥫 Canning jars – pints or quarts, sterilized and hot
- 🧢 Lids and bands – new lids for reliable sealing [citation:2]
- 🔒 Stovetop pressure canner – not an electric pressure cooker [citation:2]
💡 Pro tip: "Fill each jar to 1 inch headspace. DO NOT USE VINEGAR with milk. Vinegar curdles milk." [citation:5]
📝 Step-by-Step Canning Instructions
Step 1 – Prepare Your Jars
- Wash jars thoroughly in hot, soapy water or run through a dishwasher cycle [citation:2].
- Inspect rims carefully for chips or cracks—even minor damage can harbor bacteria [citation:2].
- If using cold-pack, keep jars at room temperature. If hot-pack, preheat in the oven at 250°F [citation:2].
- Simmer lids in warm (not boiling) water to soften the sealing compound [citation:2].
Step 2 – Fill the Jars
- Fill each jar with cold milk, leaving exactly 1 inch headspace [citation:5][citation:2].
- Do not overfill—improper headspace affects sealing [citation:4].
- Wipe rims with a clean, damp cloth.
- Do not use vinegar—the acidity can cause milk solids to curdle and interfere with sealing [citation:2][citation:5].
- Apply lids and bands fingertip-tight [citation:2].
⚠️ Critical: "Wipe your jars. DO NOT USE VINEGAR with milk. Vinegar curdles milk." [citation:5]
Step 3 – Load the Pressure Canner
- Place jars on the canner rack [citation:2].
- Add 2-3 inches of cold water (matching jar temperature prevents thermal shock and cracked jars) [citation:2].
- Close the canner lid and heat until steam flows steadily from the vent pipe.
- Allow steam to vent for 8-10 minutes to remove air [citation:2].
- Close the vent and bring to pressure.
Step 4 – The "No-Time" Method (Rebel Style)
- Bring the pressure canner to 10-11 PSI (adjust for altitude) [citation:5][citation:2].
- Once the correct pressure is reached, turn off the heat immediately [citation:5][citation:4].
- Allow the canner to depressurize naturally—this takes about 1-2 hours [citation:2].
- Do not rush the cooling process with cold water [citation:2].
💡 Pro tip: "Once it comes to pressure, add your weight and TURN IT OFF, immediately. Allow pressure to come down and remove jars from canner." [citation:5]
Step 5 – Cool and Check Seals
- Once pressure reaches zero, wait 10 minutes before removing the lid [citation:2].
- Use a jar lifter to place jars on a towel-lined counter, leaving space between them [citation:2].
- Let jars cool undisturbed for 12-24 hours [citation:2].
- Check seals by pressing the center of each lid—properly sealed jars won't flex [citation:2].
- Remove rings, label with date, and store in a cool, dark location [citation:2].
💡 Pro Tips for Perfect Canned Milk
- 🥛 Use cold milk straight from the refrigerator—this reduces the "cooked" taste [citation:2].
- 🌡️ Don't overheat—the "no-time" method minimizes the cooked flavor [citation:4].
- 🧂 No vinegar on rims—it curdles milk and prevents sealing [citation:2].
- 🔒 Use a stovetop pressure canner—electric pressure cookers are not suitable [citation:2].
- ⚖️ Adjust for altitude—add 1 PSI per 2,000 feet above sea level [citation:2].
- 📅 Reported shelf life: 1-5 years when stored in cool (50-70°F), dark locations [citation:2].
- 🍳 Best used in cooking: Canned milk has a caramelized flavor that's perfect for baking, soups, hot cocoa, and coffee [citation:4][citation:6].
❓ Frequently Asked Questions
❓ Is canning milk at home safe?
The USDA does not approve of canning milk at home. This is a "Rebel Canning" method used at your own risk [citation:1][citation:4].
❓ What happens to the milk during canning?
Expect a darker, creamier tan color with a "cooked" flavor and caramelized or nutty undertones [citation:2].
❓ What is the "no-time" method?
Bring the canner to pressure, then turn off the heat immediately, relying on the cooldown period for processing [citation:4].
❓ Can I drink canned milk straight from the jar?
Most people use it in cooking because of the "cooked" taste [citation:4][citation:6].
❓ How long does canned milk last?
Anecdotal reports suggest 1-5 years when properly sealed and stored [citation:2].
❓ Why can't I use vinegar on the rims?
Vinegar curdles milk proteins and interferes with sealing [citation:2][citation:5].
❓ Can I use raw milk?
Some homesteaders use raw milk, but it's recommended to separate the cream first [citation:11].
❓ What if my jars don't seal?
If a jar doesn't seal, refrigerate and use within a few days.
❓ Can I use a water bath canner?
No—milk is low-acid and must be pressure canned [citation:13].
❓ Will canned milk separate?
Some separation is normal—shake before using [citation:2].
📄 Printable Recipe Card
╔═══════════════════════════════════════════════════════════════════════╗
║              REBEL CANNING MILK                                     ║
║         Pressure Canned Milk – Shelf-Stable & Convenient            ║
╚═══════════════════════════════════════════════════════════════════════╝

YIELD: Varies by milk amount | TIME: ~2-3 hours (including cooldown)

INGREDIENTS & EQUIPMENT:
- Fresh milk (2%, whole, half & half, or skim)
- Canning jars (pints or quarts)
- New lids and bands
- Stovetop pressure canner

INSTRUCTIONS:
1. Sterilize jars and lids. Inspect rims for damage.
2. Fill each jar with cold milk, leaving exactly 1" headspace.
3. Wipe rims with a clean, damp cloth. DO NOT USE VINEGAR.
4. Apply lids and bands fingertip-tight.
5. Place jars in pressure canner with 2-3" cold water.
6. Vent steam for 8-10 minutes. Close vent.
7. Bring to 10-11 PSI (adjust for altitude).
8. Once pressure is reached, TURN OFF HEAT IMMEDIATELY.
9. Allow canner to depressurize naturally (1-2 hours).
10. Remove jars and cool 12-24 hours on a towel.
11. Check seals. Label and store.

STORAGE: 1-5 years (cool, dark location).

⚠️ DISCLAIMER: This is a Rebel Canning method and is not USDA-approved. Use at your own risk.

"Three gallons of milk turned into 2% and 1/2 and 1/2! I love canning milk!" 🥛✨
© CanningRebels — Rebel Canning Milk | Step-by-Step Guide









.png)

Comments