17 Pints of Homemade "Canned" Mac & Cheese: The Shelf-Stable Hack That Disappears Fast
 Introduction: The Batch That Never Lasts

The other ones did not last long.
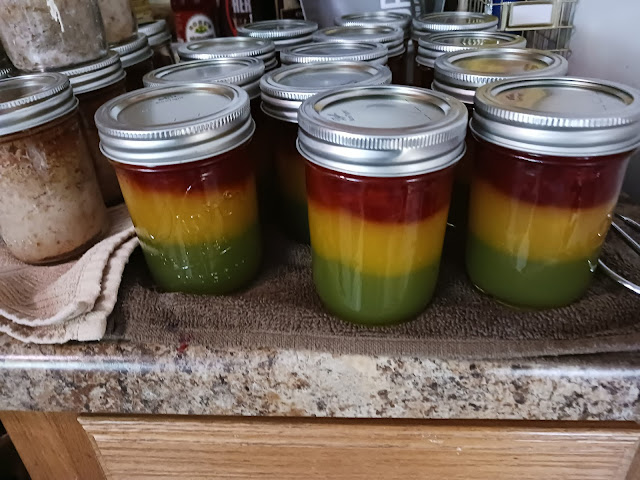
If you have ever put up a batch of home-canned mac and cheese, you already know exactly what I mean. You spend an afternoon at the stove, you line up those beautiful golden jars on the shelf, you feel that deep satisfaction of a pantry well-stocked — and then, somehow, they are gone. A quick lunch here. A "I don't feel like cooking" night there. A kid who discovers they can open a jar and have mac and cheese in four minutes flat.
So here we are again. 17 pints to reload the shelf.
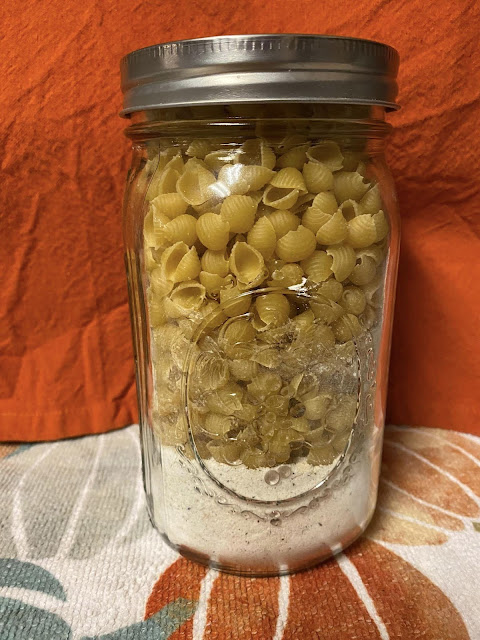
This is the recipe and the full process I use for home-canned mac and cheese — the shelf-stable kind that you pressure can and keep on the shelf for months, not the freezer kind. It is a game-changer for busy weeks, tight budgets, and anyone who wants real food ready in minutes without paying frozen-dinner prices.
Fair warning before we start: this is a pressure-canning recipe, and it is not a beginner's project. I will walk you through every step in full, but please read the safety section carefully. Home-canned dairy-and-pasta recipes are one of the more debated topics in canning circles, and I want you to make this safely, not just deliciously.
Let's get into it.
Part One: Why Canned Mac & Cheese Is Worth the Effort
Let's do the math, because this is what makes this project worth an afternoon of your life.
17 pints of mac and cheese, ready to eat.
Each pint is roughly 2 generous servings (or one very hungry teenager).
That is 34 servings sitting on your shelf.
A single box of store-bought mac and cheese runs $1.00–$2.00 and feeds two people poorly.
A frozen single-serve mac and cheese runs $3.00–$4.00.
Your cost per pint, made from scratch in bulk, is typically $1.25–$1.75 — and it tastes like actual cheese, not powder.
But the real value is not the money. It is the time you get back. On a Tuesday night when everyone is hungry and you are exhausted, you do not have to cook. You open a jar, heat it up, and dinner is done in five minutes. That is the whole point of a pantry.
And unlike the boxes, this does not have a "best by" date printed in tiny ink that you have to squint at. You canned it. You know exactly what is in it. That is a different kind of peace of mind.
Part Two: The Safety Rules (Read This Before Anything Else)
I need to be direct with you here, because this is the part that matters most.
Home-canned mac and cheese is a "rebel canning" recipe. It is not in the USDA Complete Guide to Home Canning. It is not approved by the National Center for Home Food Preservation. It is a recipe that experienced canners make and share, and it carries real risk if done carelessly. I am giving you the full method because you asked for it and because people do make it successfully — but you need to understand the rules that keep it safe.
Rule 1: This Is a Pressure Canner Recipe, Full Stop
You cannot water-bath can mac and cheese. Ever. Dairy and pasta are low-acid foods, and low-acid foods require pressure canning to reach the temperatures needed to destroy botulism spores. A water bath cannot get above 212°F. A pressure canner reaches 240°F+ at 10–15 PSI. There is no shortcut here.
Rule 2: Never Can Pure Dairy Without a Starch Binder
This is the single most important rule. If you try to can a jar of cheese sauce or milk on its own, the dairy will separate, curdle, and can even scorch or create a safety hazard. The starch — the pasta and the flour in the cheese sauce — acts as a binder that keeps the dairy suspended and stable through the canning process. The pasta is not optional. The flour is not optional. They are structural.
Rule 3: Follow the Process Exactly — No Freestyling
Do not add extra cheese "for luck." Do not skip the lemon juice. Do not reduce the processing time because your jars look fine. Every step in this recipe exists for a reason, and the reasons are food safety. If you want to experiment with flavors, do it with spices that are already in the approved ingredient list, not with the core ratios.
Rule 4: Know Your Altitude
Processing times in this recipe are for 0–1,000 feet elevation. Above 1,000 feet, you must increase pressure. The standard adjustments for a dial-gauge pressure canner are:
0–1,000 ft: 11 PSI
1,001–2,000 ft: 11 PSI
2,001–4,000 ft: 12 PSI
4,001–6,000 ft: 13 PSI
6,001–8,000 ft: 14 PSI
For a weighted-gauge canner, use 10 PSI for 0–1,000 ft and 15 PSI above 1,000 ft. Check your canner's manual and your local extension office if you are unsure.
Rule 5: If a Jar Looks Wrong, Throw It Out
Before opening any jar, check the seal. The lid should be concave and firm. If the lid flexes, if the jar is leaking, if the contents look cloudy, discolored, or smell off when you open it — do not eat it. Toss it. A jar of mac and cheese is not worth a trip to the hospital. Botulism is odorless and tasteless, so when in doubt, throw it out.
Rule 6: Boil Before Serving (The 10-Minute Rule)
Even properly canned low-acid foods should be boiled for 10 minutes before eating as an extra layer of safety, especially if you are new to canning or unsure about your process. This is the standard recommendation for home-canned low-acid foods. It costs you ten minutes and buys you real peace of mind. Do it.
If any of that gives you pause — and it is okay if it does — the alternative is to make this recipe and freeze it in pint containers instead of canning it. You get the same convenience, no pressure canner required, and zero botulism risk. I will include freezer instructions at the end.
Part Three: The Recipe — Home-Canned Mac & Cheese (17 Pints)
Prep time: 30 minutes
Cook time: 45 minutes (plus canning time)
Yield: 17 pint jars (or 8–9 quart jars)
Processing time: 75 minutes for pints, 90 minutes for quarts (at 11 PSI, 0–1,000 ft)
Ingredients
For the Pasta:
3 pounds elbow macaroni (or your preferred short pasta)
Salt for the pasta water
For the Cheese Sauce:
1 cup butter (2 sticks)
1 cup all-purpose flour
8 cups whole milk (do not use skim — the fat helps stability)
1 tablespoon dry mustard powder
2 teaspoons kosher salt (adjust to taste)
1 teaspoon black pepper
1 teaspoon smoked paprika (optional, for depth)
16 ounces sharp cheddar, shredded (about 4 cups)
8 ounces Monterey Jack or Gruyère, shredded (about 2 cups) — for melt and stretch
2 tablespoons lemon juice (bottled, not fresh — bottled is standardized acidity)
Equipment:
Pressure canner (dial or weighted gauge)
17 pint jars, lids, and bands (or 8–9 quart jars)
Jar lifter, funnel, lid wand, bubble remover
Large stockpot for pasta
Heavy-bottomed pot for cheese sauce
Part Four: The Full Step-by-Step Process
Step 1: Prep Your Jars and Canner
Wash your jars, lids, and bands in hot soapy water. Rinse well.
Keep the jars hot until you fill them. You can hold them in a 200°F oven, in a pot of simmering water, or run them through the dishwasher and leave them on the heated dry cycle.
Fill your pressure canner with the recommended amount of water per your manual (usually 2–3 inches). Put it on the stove to start heating while you cook. Do not put the lid on yet.
Put the lids in a small saucepan of hot (not boiling) water to soften the sealing compound. Do not boil them.
Step 2: Cook the Pasta — Slightly Under
Bring a large pot of generously salted water to a boil.
Add the 3 pounds of elbow macaroni.
Cook for 2 minutes less than the package directions for al dente. The pasta will continue to absorb liquid and soften during canning. If you cook it fully now, it will turn to mush in the jar.
Drain the pasta and rinse it briefly with cold water to stop the cooking. Set aside.
Why this matters: Undercooking the pasta is the difference between jars of tender mac and cheese and jars of paste. Do not skip this.
Step 3: Make the Cheese Sauce
In a heavy-bottomed pot, melt the butter over medium heat.
Whisk in the flour and cook, stirring constantly, for 2 minutes. This cooks out the raw flour taste. You are making a roux.
Slowly pour in the milk, whisking constantly to prevent lumps. Add the milk in a steady stream, not all at once.
Add the dry mustard, salt, pepper, and smoked paprika. Whisk to combine.
Cook over medium heat, stirring frequently, until the sauce thickens enough to coat the back of a spoon. This takes about 8–10 minutes. Do not let it boil hard.
Remove from heat. Add the shredded cheeses in handfuls, stirring until each handful melts before adding the next. If the sauce looks grainy, it got too hot — lower your heat next time and whisk more.
Stir in the lemon juice. Taste and adjust salt.
Why the lemon juice? It adds a touch of acidity that helps balance the richness and gives the sauce a brighter flavor after canning. Bottled lemon juice is used because it has a standardized acidity level, which matters for consistency.
Step 4: Combine Pasta and Sauce
Add the drained, undercooked pasta to the cheese sauce.
Stir gently until every noodle is coated.
Let the mixture rest for 5 minutes so the pasta absorbs some of the sauce. It should look thick and cohesive, not soupy. If it looks dry, add a splash of milk. If it looks too loose, let it sit a bit longer.
Step 5: Fill the Jars
Using a ladle and a funnel, fill each hot jar with the mac and cheese mixture.
Leave 1 inch of headspace at the top of each jar. This is critical — do not overfill.
Use a bubble remover or a thin spatula to run around the inside of the jar and release trapped air bubbles. Press gently against the pasta to settle it.
Top off with additional sauce if needed to maintain the 1-inch headspace.
Wipe the rim of each jar with a clean, damp cloth. Any residue on the rim will prevent a seal.
Center a softened lid on each jar and screw on a band until it is fingertip-tight. Do not crank it down hard.
Step 6: Load the Canner
Place the jars on the rack in your pressure canner. Do not let them touch each other or the sides of the canner.
Add hot water to the canner if needed to reach the level specified in your manual. The water should not come more than halfway up the jars.
Lock the lid on the canner according to the manufacturer's instructions.
Step 7: The Pressure Canning Process
Turn the heat to high. Leave the vent open (or the weighted gauge off) until steam has escaped steadily for 10 minutes. This vents the air out of the canner. Air trapped inside will throw off your pressure readings and your processing.
Close the vent or put on the weighted gauge.
Watch the pressure rise. Once it reaches 11 PSI (for a dial gauge at 0–1,000 ft) or 10 PSI (weighted gauge), start your timer.
Adjust the heat to maintain steady pressure. You want a gentle, consistent jiggle or a steady dial reading — not wild swings.
Process pints for 75 minutes and quarts for 90 minutes. Do not leave the kitchen for the first 15 minutes. Once the pressure is stable, you can step away but check back often.
Never open the canner or turn off the heat abruptly while under pressure.
Step 8: Depressurize and Cool
When the timer ends, turn off the heat.
Let the canner cool completely on its own. Do not rush this. Do not run cold water on it. Do not open the lid until the pressure gauge reads zero and the lid unlocks easily. This can take 30–60 minutes.
Once the pressure is at zero, carefully remove the lid, tilting it away from you to avoid steam burns.
Let the jars sit in the canner for 5 minutes, then lift them out with a jar lifter and place them on a towel on the counter.
Leave them undisturbed for 12–24 hours. You will hear the satisfying "ping" of lids sealing. Do not press on the lids, do not move the jars, do not cover them with a towel.
Step 9: Check the Seals and Store
After 12–24 hours, check each lid. The center should be concave and firm. If you can press it down and it pops back up, the jar did not seal.
Unsealed jars go in the fridge and get eaten within a week. Do not re-process them.
Wipe the sealed jars clean, remove the bands (optional, but recommended — it prevents rust and stops false seals from hiding), and label them with the date and contents.
Store in a cool, dark, dry place. Use within 12 months for best quality.
Part Five: Reheating and Serving (The 5-Minute Dinner)
This is the payoff. Here is how to turn a jar on your shelf into dinner.
The Stovetop Method (Best Texture)
Open the jar and pour the contents into a saucepan.
Add a splash of milk (2–4 tablespoons per pint).
Heat over medium-low, stirring frequently, until hot throughout. Do not boil hard — the dairy can break.
Serve immediately.
The Microwave Method (Fastest)
Empty the jar into a microwave-safe bowl.
Add a splash of milk.
Cover loosely and microwave in 1-minute bursts, stirring between each, until hot. This takes about 3–4 minutes for a pint.
The Bake Method (For Company)
Empty 2–3 jars into a buttered baking dish.
Add a splash of milk and stir.
Top with buttered breadcrumbs and extra cheese.
Bake at 350°F for 20–25 minutes until bubbly and golden.
Serving Ideas
Classic: Serve with a side of steamed broccoli and a sprinkle of paprika.
Loaded: Top with crumbled bacon, green onions, and a dollop of sour cream.
Spicy: Stir in a spoonful of chili crisp or diced jalapeños.
Kids' favorite: Serve plain, with a side of apple slices.
Part Six: The Freezer Alternative (No Pressure Canner Required)
If the pressure canning process is not for you, or you want a zero-risk option, make the recipe exactly as written through Step 4, then freeze instead of canning.
Let the mac and cheese cool completely.
Portion into pint freezer containers or zip-top freezer bags laid flat.
Freeze for up to 3 months.
To reheat: thaw overnight in the fridge, then reheat on the stovetop or in the microwave with a splash of milk.
You get the same convenience with none of the canning risk. It is a perfectly valid choice.
Part Seven: Storing the Rest of Your Batch
Seventeen pints sounds like a lot — until they start disappearing. Here is how to protect your shelf.
Rule 1: Label Everything
Date and contents on every lid. Sharpie on the lid is fine. You will not remember which batch was which in three months.
Rule 2: Rotate Front to Back
When you add new jars to the shelf, put them behind the older ones. Use the oldest first. This is the same rule grocery stores use, and it works.
Rule 3: Keep a "Use First" Shelf
Have one shelf or basket for jars that are nearing the 12-month mark. That is your go-to spot for quick lunches and busy nights.
Rule 4: Watch for Spoilage Signs
Before opening any jar, check:
Is the lid still sealed and concave?
Is the contents discolored, cloudy, or bubbling?
Does it smell wrong when opened?
If anything is off, throw it out. No exceptions.
Rule 5: Do Not Stack Heavy on Top
Jars are glass. Stack them carefully, or use a shelf liner, but do not put heavy items on top of your pints.
Part Eight: Troubleshooting (What Went Wrong and How to Fix It)
Problem: The Sauce Separated or Looked Curdled in the Jar
Cause: The sauce got too hot during cooking, or the dairy was too lean (skim milk), or the starch binder was insufficient.
Fix for next time: Use whole milk, keep the sauce below a hard boil, and make sure the roux is fully cooked before adding milk. This batch is still safe to eat if the seal is good — just stir it well when reheating.
Problem: The Pasta Turned to Mush
Cause: You cooked the pasta fully before canning.
Fix for next time: Undercook by 2 minutes. The canning process finishes the cooking.
Problem: Jars Did Not Seal
Cause: Residue on the rim, a nick in the jar rim, overfilled jars, or a lid that was not properly softened.
Fix: Refrigerate unsealed jars and eat within a week. Do not re-process.
Problem: The Cheese Tastes Grainy After Canning
Cause: Sharp cheddar alone can go grainy under heat. That is why this recipe uses a blend with Monterey Jack or Gruyère — they melt more smoothly.
Fix for next time: Increase the proportion of Jack and decrease the cheddar slightly, or add a tablespoon of sodium citrate per batch if you want a smoother melt (note: this is a processed-cheese-style additive and changes the texture).
Problem: The Jars Are Cloudy or the Liquid Looks Strange
Cause: Could be starch residue (harmless) or could be spoilage (not harmless).
Fix: If the seal is good and it smells fine when opened, it is likely starch. If in doubt, throw it out. Never gamble.
Part Nine: Why This Recipe Matters for Your Pantry
There is a reason I keep making this batch. Seventeen pints is not just food. It is time, money, and calm.
On a night when the fridge is empty and the day was long, I do not have to order takeout. I do not have to feel guilty about a box of powdered cheese. I walk to the shelf, I grab a jar, and I feed my family something real in five minutes.
That is the whole philosophy behind this blog. Pantry staples are not about deprivation. They are about preparation. They are about building a small buffer between you and the chaos of everyday life. And a shelf full of golden jars of mac and cheese is a very good buffer indeed.
So here is to 17 more pints. Here is to the batch that will not last long. And here is to you, standing in your kitchen, reloading your shelf.
Have you made home-canned mac and cheese? What is your favorite add-in? Share it in the comments below — and if you try this batch, tell me how many pints you put up.
Recipe Card (For Pinning and Printing)
Home-Canned Mac & Cheese
Prep: 30 mins | Cook: 45 mins | Process: 75 mins (pints) / 90 mins (quarts) | Yield: 17 pints
Ingredients:
3 lbs elbow macaroni
1 cup butter
1 cup all-purpose flour
8 cups whole milk
1 tbsp dry mustard
2 tsp kosher salt
1 tsp black pepper
1 tsp smoked paprika (optional)
16 oz sharp cheddar, shredded
8 oz Monterey Jack or Gruyère, shredded
2 tbsp bottled lemon juice
Instructions:
Cook pasta 2 minutes under package directions. Drain.
Make roux with butter and flour. Whisk in milk, mustard, salt, pepper, paprika. Thicken.
Off heat, melt in cheeses. Stir in lemon juice.
Combine pasta and sauce. Rest 5 minutes.
Fill hot jars to 1-inch headspace. Remove bubbles. Wipe rims. Lid and band fingertip-tight.
Process in pressure canner at 11 PSI (dial) / 10 PSI (weighted), 0–1,000 ft: 75 min pints, 90 min quarts.
Cool completely, check seals after 12–24 hours. Store up to 12 months.
Boil 10 minutes before serving as an extra safety step.
Freezer option: Skip canning; freeze in pint containers up to 3 months.
A final note on safety: This is a home-canning recipe for experienced canners. Follow the process exactly, know your altitude, and when in doubt, freeze instead of can. Your local extension office is a free resource if you have questions about pressure canning in your area.









Comments