
Pretty Pepper Jelly in Jars! (With a Great Anti-Foam Trick)

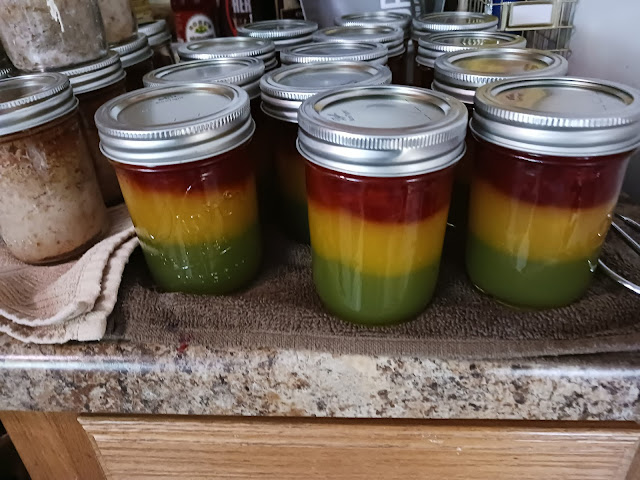
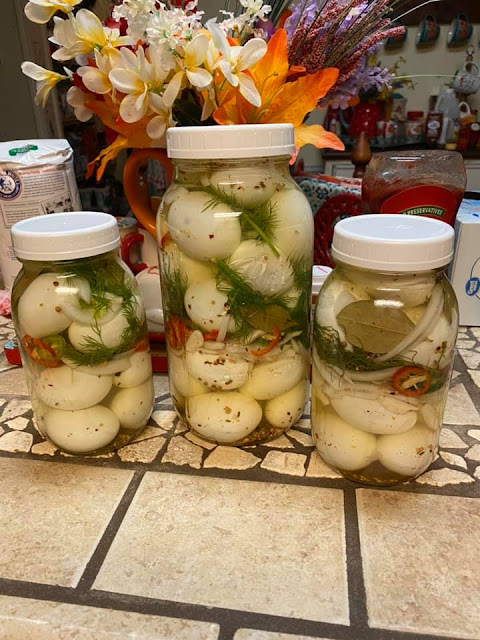
I think my Pepper Jelly is so pretty in the jars! There is something so satisfying about seeing those bright, jewel-toned jars lined up on the counter after a long day in the kitchen.
If you look closely at the picture, the one that's upright didn't go in the canner—I used the small canner and ran out of room, so that one is going straight into the fridge to enjoy right away. The rest of them? They all pinged and sealed beautifully!
I got the recipe from a person on this site, and I made one tiny tweak that made a huge difference: I added a tad slice of butter. Walla, no foam to scoop out! It’s a classic old-school jelly-making trick that saves so much time and keeps the jelly crystal clear.
Here is the full recipe and the step-by-step guide so you can make your own beautiful pepper jelly.
Why You'll Love This Recipe
It’s beautiful. The bright colors of the peppers look stunning in the jars.
It’s sweet and spicy. The perfect balance of flavors.
It’s quick. The active cooking time is only about 12 minutes!
It’s easy. Using liquid pectin makes it foolproof.
The Butter Trick. Adding a tiny bit of butter eliminates the need to skim foam.
It makes wonderful gifts. A jar of homemade pepper jelly with a ribbon is a highly coveted gift.
Ingredients You'll Need
1.5 cups sweet peppers (preferably three colours), finely diced
3 cups sugar
3/4 cup apple cider vinegar
1 pouch liquid pectin (85 ml)
A tiny sliver of butter (about 1/4 teaspoon) — The secret trick!
Why These Ingredients Matter
Sweet peppers provide the beautiful color and the bulk of the jelly. Using three different colors (red, yellow, and orange) makes it incredibly pretty.
Sugar is essential. It not only sweetens the jelly but also helps it set properly.
Apple cider vinegar provides the necessary acidity for safe water-bath canning and balances the sweetness.
Liquid pectin is what makes the jelly set.
Butter might seem odd in jelly, but a tiny amount helps reduce surface tension, preventing those annoying bubbles and foam from forming during the boil.
Equipment Needed
Large stainless steel or enamel pot (do not use aluminum)
Jars, lids, and screw bands
Water bath canner (or a small canner for smaller batches!)
Jar lifter
Canning funnel
Step-by-Step Instructions
Step 1: Combine Peppers, Sugar, and Vinegar
In a large stainless steel or enamel pot, combine the finely diced peppers, sugar, and vinegar.
Step 2: Add the Butter Trick
Add your tiny sliver of butter to the pot.
Step 3: Initial Boil
Over high heat, bring the mixture to a boil, stirring constantly. Allow it to boil for exactly one minute.
Step 4: Add the Pectin
Stir in the liquid pectin. Bring the mixture back to a full rolling boil (a boil that cannot be stirred down) and boil hard for exactly one minute, stirring constantly.
Step 5: Fill the Jars
Remove the pot from the heat. Ladle the hot jelly into hot, sterilized jars, leaving 1/4-inch of headspace. (No need to skim foam if you used the butter!)
Step 6: Seal and Process
Wipe the rims clean. Put on the lids and twist the screw bands just until fingertip-tight. Process the jars in a boiling water bath canner for 10 minutes (adjust for altitude if you live above 1,000 feet).
Step 7: Cool and Set
Remove the jars and allow them to cool undisturbed for 12 to 24 hours. Listen for the satisfying "ping" of the lids sealing!
Note: Any jars that didn't fit in the canner (like the upright one in the photo!) should go straight into the refrigerator and be eaten within 3 weeks.
Expert Tips
The Butter Trick is a game-changer: Just a tiny sliver of butter prevents the foam from forming, saving you the hassle of skimming.
Finely dice the peppers: You want small, uniform pieces so the jelly is easy to spread.
Don't skip the rolling boil: The full rolling boil for one minute is crucial for activating the liquid pectin.
Check every seal: If any jar doesn't "ping" and seal, put it in the fridge.
Recipe Variations
Spicy Pepper Jelly: If you prefer a spicy pepper jelly, use hot peppers, or a combination of sweet and hot, depending on your desired spice level.
Storage and Freezing
Storage: Store sealed jars in a cool, dark place for up to 1 year.
Refrigerator: Refrigerate any unsealed jars (or jars that didn't fit in the canner) immediately and consume within 3 weeks.
Frequently Asked Questions
Why did you put one in the fridge?
I used a small canner and it didn't fit! Any jar that isn't water-bath processed must be stored in the fridge and eaten fresh.
Does the butter change the taste?
Not at all! A tiny sliver of butter is way too small to alter the flavor, but it completely stops the foam.
What kind of peppers should I use?
Any sweet bell peppers work great. Using a mix of red, yellow, and orange makes the prettiest jelly.
Printable Recipe Card
PRETTY PEPPER JELLY (WITH THE NO-FOAM BUTTER TRICK)
Yield: 5 to 6 half-pint jars | Prep Time: 10 minutes | Cook Time: 12 minutes | Total Time: 22 minutes
Ingredients:
1.5 cups sweet peppers (preferably three colours), finely diced
3 cups sugar
3/4 cup apple cider vinegar
1 pouch liquid pectin (85 ml)
1/4 teaspoon butter (to prevent foam)
Instructions:
In a large stainless steel or enamel pot, combine diced peppers, sugar, vinegar, and the tiny sliver of butter.
Over high heat, bring to a boil, stirring constantly, and boil for one full minute.
Stir in liquid pectin, bring back to a full rolling boil, and boil hard for one full minute.
Remove from heat and ladle into hot, sterilized jars, leaving 1/4-inch headspace.
Wipe rims, put on lids, and twist screw bands just finger tight.
Process in boiling water bath for 10 minutes.
Allow to cool, in which time you should hear the pop of the sealing jars, and your jelly will thicken.
Notes: If you prefer a spicy pepper jelly, use hot peppers, or a combination of sweet and hot. Any jars that don't fit in the canner or don't seal must be refrigerated and eaten within 3 weeks.
From the maker: "I just added a tad slice of butter, Walla no foam to scoop out."
Disclaimer: This article is for informational and educational purposes only. Always follow safe canning practices from the USDA or your local extension service. Use tested recipes and proper canning procedures to ensure food safety.









Comments