
Flour Preservation Masterclass: Canning for Long-Term Storage and Pest-Free Pantry

Canning flour is a brilliant solution for ensuring the long-term storage of all-purpose flour,gluten-free flour, and even protein pancake mix.
By following a simple process and employing the power of heat, you can eliminate pests and extend the shelf life of your flour for up to 25 years. In this article, we will guide you through the canning process, sharing a step-by-step recipe to help you preserve your flour while maintaining its quality and freshness.
Recipe: Canning Flour for Long-Term Storage
Ingredients:
- - All-purpose flour, gluten-free flour, or protein pancake mix
- - Quart-sized canning jars
- - Oven
Instructions:
1. Preheat the oven:
- - Preheat your oven to 200°F (93°C). This low temperature will help eliminate pests while preserving the quality of the flour.
2. Prepare the canning jars:
- - Ensure the canning jars are clean and dry, free from any moisture or residue.
- - Fill each quart-sized jar with three cups of the desired flour or pancake mix, leaving some headspace at the top.
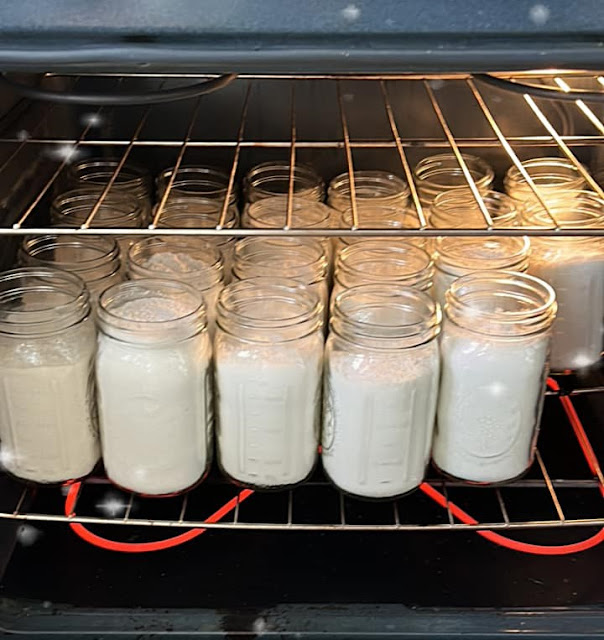
3. Bake the jars:
- - Place the filled jars in the preheated oven, without their caps.
- - Let the jars bake at 200°F (93°C) for 45 minutes. This heat treatment will kill any weevils or bugs that may be present in the flour.
4. Cap the jars:
- - After 45 minutes, carefully remove the jars from the oven using oven mitts.
- - Immediately cap the jars tightly to create a seal. Alternatively, you can wait for 10 minutes before capping if you prefer to allow any moisture to escape.
5. Allow the jars to cool:
- - Once capped, let the jars cool completely before moving them. This will ensure that the seal is properly formed and the flour is protected.
6. Label and store:
- - Label each jar with the type of flour or mix and the date of canning.
- - Store the jars in a cool, dry place away from direct sunlight and extreme temperature fluctuations.
7. Monitor and use:
- - Periodically check the jars to ensure the seals remain intact.
- - When ready to use the canned flour, simply open a jar and measure out the required amount for your recipes.
- - Enjoy the convenience of having long-lasting flour at your fingertips, free from pests and ready for culinary adventures.
Canning flour is a game-changer for long-term storage, providing protection against pests and extending the shelf life of your favorite flours and pancake mixes. By following a straightforward process of baking the filled jars in the oven and capping them tightly, you can ensure the longevity of your flour for up to 25 years. Say goodbye to weevils and bugs, and embrace the peace of mind that comes with having a reliable and well-preserved flour supply. With this simple recipe, you can enjoy the convenience of readily available flour, whether it's all-purpose, gluten-free, or protein pancake mix, whenever your culinary endeavors call for it.


Comments
Can I do this with almond flour and bulk muffin base mix
ReplyDeleteCan this be done with self rising flour? It's not mentioned in the installation. Thank you
ReplyDeleteCan I do this with corn meat
ReplyDeleteCan I do this with self rising flour and self rising corn meal?. Please reply. Thank you.
ReplyDeleteQuestion.....is there a problem with proper sealing if wait 10" prior to sealing? Would it help if rings and lids were on top of the range during the 45" processing time thus eliminating possibility of moisture forming?
ReplyDelete