
A Reliable Recipe for Canning Christmas Jam

The holiday season is a time of joy, celebration, and indulging in delicious treats.
One delightful homemade gift that captures the essence of Christmas is a jar of perfectly crafted Christmas jam. With its vibrant colors, sweet-tart flavors, and delightful aroma, Christmas jam is a delightful addition to any festive spread or a thoughtful gift for loved ones.
If you're looking for a reliable recipe to create your own batch of Christmas jam, look no further. We have a tried and true recipe that will guide you through the process of canning this delectable treat, ensuring that you can enjoy its flavors long after the holiday season has passed.

Ingredients:
- - 4 cups cranberries
- - 2 cups strawberries, hulled and chopped
- - 2 oranges, zest and juice
- - 3 cups granulated sugar
- - 1 teaspoon ground cinnamon
- - 1/2 teaspoon ground nutmeg
- - 1/4 teaspoon ground cloves
- - 1 package (1.75 oz) powdered fruit pectin
Instructions:
1. Prepare the jars and lids: Start by sterilizing your jars and lids according to proper canning practices. This step is crucial to ensure the freshness and longevity of your Christmas jam.
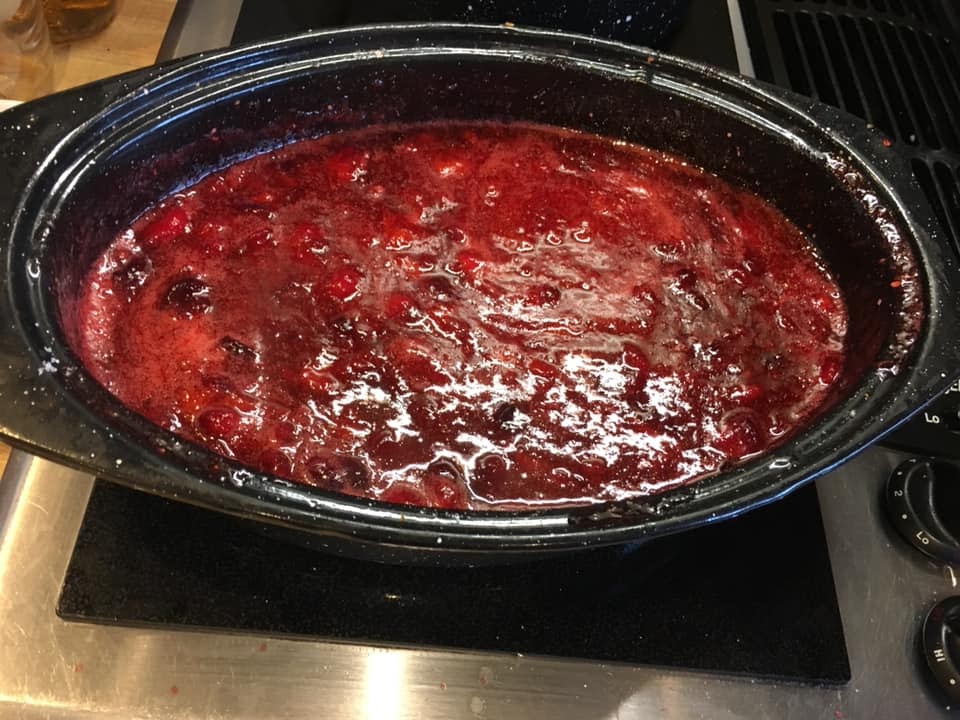
2. Prepare the fruit: In a large saucepan, combine the cranberries, strawberries, orange zest, and orange juice. Place the saucepan over medium heat and bring the mixture to a simmer. Cook for about 15 minutes, or until the fruit has softened and released its juices.
3. Add the sugar and spices: Stir in the granulated sugar, cinnamon, nutmeg, and cloves. Continue to cook the mixture, stirring frequently, until the sugar has completely dissolved.
4. Incorporate the pectin: Sprinkle the powdered fruit pectin evenly over the fruit mixture while stirring continuously. This will help the jam achieve its desired gel-like consistency. Continue to cook the jam for an additional 10 minutes, stirring occasionally to prevent sticking.
5. Test for gel stage: To check if the jam has reached the desired gel stage, place a small amount on a chilled plate and allow it to cool for a few minutes. If the jam thickens and holds its shape when pushed with a spoon, it has reached the gel stage. If not, continue cooking for a few more minutes and repeat the test.
6. Fill the jars: Carefully ladle the hot Christmas jam into the prepared jars, leaving about 1/4 inch of headspace at the top. Wipe the rims of the jars to remove any spills or residue, then place the lids on top and seal them tightly.
7. Process the jars: Submerge the filled jars in a boiling water bath, making sure they are fully covered with water. Process for about 10 minutes to create a proper seal and ensure the jam is safely preserved.
8. Cool and store: Once the processing time is complete, carefully remove the jars from the water bath and place them on a towel-lined surface. Allow the jars to cool undisturbed for several hours. As they cool, you may hear the satisfying "pop" of the lids, indicating a successful seal. Store the cooled jars in a cool, dark place for up to one year.

Now that you have mastered the art of canning Christmas jam, you can enjoy this delightful treat throughout the year. Whether it's spread on warm toast, layered in a holiday trifle, or gifted to friends and family, the flavors of cranberries, strawberries, oranges, and warm spices will evoke the joyful spirit of the holiday season.


.png)

Comments
appox how many jars does this make ?
ReplyDeleteHow many jars, and what size?
ReplyDeleteMade this today and only got 6-8oz jars from recipe.
DeleteWonder if we could leave out the sugar??
ReplyDeleteI'd like to try it with Monk fruit sweetener as that's what I use instead of sugar.
DeleteYou need the sugar for it to gel! Otherwise, you will have chopped, cooked fruit.
DeleteI used honey and no pectin and just let it cook longer and it was fine.
DeletePlease... can someone tell me How many jars and What size you used?
ReplyDeleteI discovered Christmas jam last year and love it! I’ve made with sugar and some with monk fruit. The monk fruit crystallized in chunks when refrigerated. I’ll stick to sugar and lots of extra orange Zest
DeleteI made this today. It makes 8 half pint jars of jam. 😊
DeleteI'm confused. The instructions say to add the orange zest and juice, which implies that you don't add the actual orange pieces. But the picture clearly shows the orange pieces. Do you add them?
ReplyDeleteMy read is you use two oranges and the zest and juice. :-)
DeleteYes, I’m making this right now. Even though I’ve used two large very juicy oranges it doesn’t look to be enough juice. After I added the sugar it helped with the juice. It filled 7, 8 oz jars.
DeleteI was trying to figure out how many jars to buy & see I wasn't the only one trying to figure it out. My MIL says 1 package 1.75 oz pectin makes abt 8 - 8oz jars of jam.
ReplyDeleteCan you make these recipes printable? It's a pain to have to write it all out.
ReplyDeleteCopy and paste is what I do. I have all of my recipes in Samsung Notes using copy and paste. Sometimes I have to do this in segments, but eventually I get the whole recipe.
DeleteI agree how about a print button on all recipes please!
DeleteCan I use frozen cranberries and strawberries
ReplyDeleteThis is a poorly written recipe. This is not the correct way to use pectin. Maybe the writer should read the instructions before writing a recipe.
ReplyDeleteThese pictures are my pictures that this lady stole off of a Facebook canning site she probably has never had made this and sh has stood other people pictures too ….,
ReplyDeleteCould you please post the link to your recipe so I can make this correctly
DeleteHow can I do this but have it smooth jam, do I just blitz it after cooking before canning? Thanks
ReplyDelete