
From Excess Milk to Delicious Gravy: A Recipe to Prevent Food Waste
We've all been there - gifted with an abundance of milk that we know we won't be able to consume before it expires.

It's a dilemma that leaves us pondering, "What to do! What to do!" But fear not, because I have a solution that will not only prevent food waste but also provide you with a versatile and delicious addition to your meals. Get ready to make homemade gravy for the freezer!
Step 1: Gather Your Ingredients
To begin, gather the following ingredients:
- 2 gallons of milk (or adjust the quantities based on the amount you have)
- Salt and pepper to taste
- Optional: herbs and spices such as thyme, rosemary, or garlic powder for added flavor
Step 2: Preparing the Gravy
- In a large pot, pour the excess milk that you have been gifted. If you already have some milk in your refrigerator, combine the two to maximize your gravy yield. Remember, we don't want any of this precious milk to go to waste!
Step 3: Cooking the Gravy
- Place the pot of milk on the stove over medium heat. Stir the milk continuously to prevent scorching and sticking to the bottom of the pot. This process requires some patience, as you want the milk to heat gradually without boiling over.
- As the milk heats up, it will start to thicken. This transformation occurs due to the natural sugars and proteins present in the milk. Continue stirring gently to ensure even heat distribution.
Step 4: Seasoning the Gravy
Once the milk has thickened to a desired consistency, it's time to season your gravy. Add salt and pepper according to your taste preferences. Feel free to experiment with additional herbs and spices to enhance the flavor. Thyme, rosemary, or garlic powder can add a delightful touch to your gravy.
Step 5: Letting the Gravy Cool
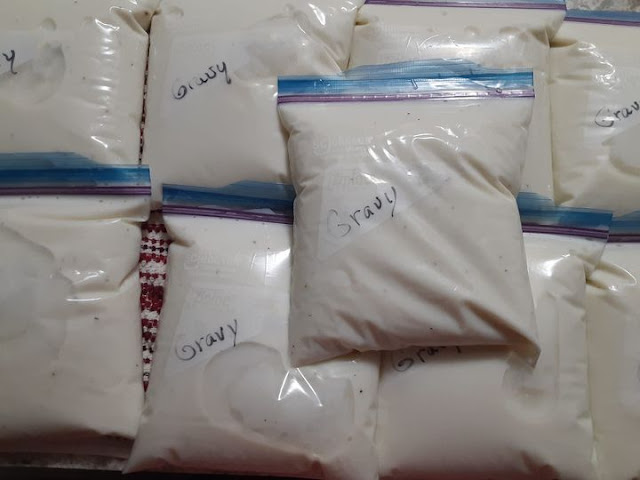
- Allow the gravy to cool completely before transferring it to freezer-safe containers or freezer bags. Make sure to leave some headspace in the containers to allow for expansion during freezing. Label the containers with the date and contents for easy reference in the future.
Step 6: Freezing and Storage
- Place the containers in the freezer and let the magic of freezing preserve your homemade gravy. The gravy can be stored in the freezer for up to 3 months, ensuring that you have a versatile sauce ready whenever you need it.
Step 7: Utilizing the Grav
- When you're ready to use the gravy, simply thaw it in the refrigerator overnight or defrost it in the microwave on a low setting. Once thawed, heat it gently on the stove, stirring occasionally, until it reaches your desired temperature.
- This homemade gravy is incredibly versatile and can be used in various dishes. Pour it over mashed potatoes, biscuits, or roasted vegetables for a comforting meal. It also pairs well with sausages, chicken, or even as a flavorful base for soups and stews.
Step 8: Don't Let Food Go to Waste!
- By making homemade gravy from excess milk, you're not only preventing food waste but also creating a delicious and convenient ingredient for future meals. So, the next time you find yourself with more milk than you can consume, remember this simple recipe and transform that milk into a freezer staple that will elevate your dishes.
- Let's embrace the spirit of resourcefulness and ensure that no food goes to waste. Happy cooking and freezing!
FAQs
1. Can I use this gravy recipe with plant-based milk alternatives?
- Absolutely! While the original recipe uses dairy milk, you can adapt it to plant-based milk alternatives such as almond milk, soy milk, or oat milk. Just keep in mind that the consistency and flavor may vary slightly, so adjust the seasoning accordingly.
2. How should I thaw the frozen gravy?
- The best way to thaw the frozen gravy is to transfer it from the freezer to the refrigerator and let it thaw overnight. If you're in a hurry, you can use the defrost setting on your microwave, but be sure to use a low power setting and stir the gravy frequently to ensure even thawing.
3. Can I customize the flavors of the gravy?
- Absolutely! This basic recipe provides a versatile base, and you can customize the flavors to suit your preferences. Feel free to experiment with additional herbs, spices, or even a splash of Worcestershire sauce to create your own signature gravy
- Don't let excess milk go to waste! Instead, transform it into a homemade gravy that can be stored in the freezer for future use. Embrace the joy of resourcefulness in the kitchen and enjoy the convenience of having flavorful gravy at your fingertips whenever you need it. Happy cooking and freezing!


Comments