🧄 Scrumptious Garlic Jelly
A Market Success Story & Recipe

🧄 Homemade garlic jelly — sweet, savory, and a market favorite!
📌 In This Article
🧄 The Garlic Jelly Entrepreneur
"Today, we delve into the world of culinary triumphs and share the inspiring stories of individuals who turned their passion for food into thriving enterprises." 🧄✨
Behind every thriving business venture lies the determination, creativity, and unwavering spirit of successful entrepreneurs. Today, we explore the journey of one such entrepreneur who experienced remarkable success with their garlic jelly at the local market.
What started as a simple experiment in the kitchen quickly turned into a sold-out sensation. The unique combination of sweet and savory flavors captivated customers, and demand soared so high that additional batches were needed almost immediately. It's a testament to the power of passion, perseverance, and a truly delicious product.
And now, you can try it for yourself! Below is the exact recipe for this mouthwatering garlic jelly that has become a market favorite.
💬 The takeaway: "The journey from market success to culinary triumphs highlights the dedication and innovation of aspiring entrepreneurs." — You can do it too!
📦 Ingredients
- 🧄 2 cups garlic cloves (peeled and finely minced)
- 💧 4 cups water
- 🍎 1 cup apple cider vinegar
- 🍬 6 cups granulated sugar
- 📦 1 package (3 ounces) liquid pectin
- 🍋 1 tablespoon lemon juice
- 🌶️ Optional: Red pepper flakes (for a touch of heat)
📝 Step-by-Step Instructions
Step 1: Preparing the Garlic
Begin by peeling and finely mincing the garlic cloves. You can use a sharp knife or a food processor to achieve the desired consistency.
Step 2: Creating the Garlic Infusion
In a large saucepan, combine the minced garlic and water. Bring the mixture to a boil over medium heat. Reduce the heat and let the garlic simmer in the water for approximately 10 minutes. This process infuses the liquid with the robust flavor of garlic.
Step 3: Straining the Garlic Infusion
Once the simmering is complete, strain the garlic-infused liquid using a fine-mesh sieve or cheesecloth. Collect the infused liquid in a clean saucepan.
Step 4: Adding the Remaining Ingredients
To the strained garlic infusion, add the apple cider vinegar and granulated sugar. Stir well to ensure the ingredients are thoroughly combined. Place the saucepan over medium-high heat and bring the mixture to a rolling boil, stirring constantly until the sugar has completely dissolved.
Step 5: Incorporating Pectin and Lemon Juice
When the mixture reaches a rolling boil, add the liquid pectin and lemon juice. Vigorously stir to ensure even distribution.
Step 6: Infusing Optional Heat
For those who enjoy a hint of spice, consider adding a pinch of red pepper flakes to the jelly mixture. Adjust the amount according to your preference.
Step 7: Boiling and Skimming
Allow the mixture to continue boiling for approximately 1 minute, stirring constantly. This step activates the pectin and aids in the jelly's setting process. During boiling, you may notice foam forming on the surface. Skim off any foam using a spoon or skimmer to achieve a clear and visually appealing jelly.
Step 8: Testing for Set Point
To determine if the jelly has reached the desired set point, perform a spoon or plate test. Place a small amount of jelly on a chilled plate or spoon and let it cool for a few seconds. If the jelly wrinkles when pushed with your finger, it has reached the set point. If not, continue boiling for another minute and retest.
Step 9: Canning and Sealing
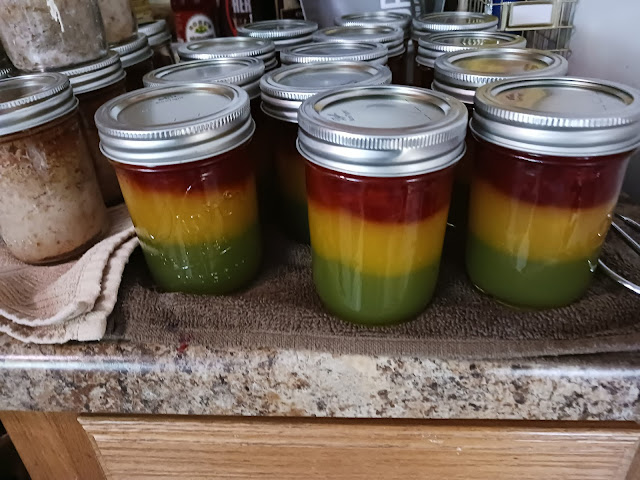
Ladle the hot garlic jelly into sterilized half-pint or three-quarter pint jars, leaving approximately ¼ inch of headspace. Wipe the jar rims clean to ensure a proper seal. Place the lids on the jars and tighten the bands until they are finger-tight.
Step 10: Processing the Jars
Process the filled jars in a water bath canner according to the manufacturer's instructions and the recommended processing time for your altitude. Typically, garlic jelly is processed for 10 minutes.
Step 11: Cooling and Storage
Once the processing time is complete, carefully remove the jars from the canner using a jar lifter. Place the jars on a towel-lined surface and allow them to cool undisturbed for 12 to 24 hours. As the jars cool, you may hear the satisfying "pop" sound of the lids sealing. After cooling, check the seals by pressing down on the center of the lids. If the lids do not flex or pop, the jars are properly sealed. Store the sealed jars in a cool, dark place. When stored correctly, garlic jelly can maintain its quality for up to 1 year.
💡 Pro Tip: "The satisfying 'pop' sound of the lids sealing" — It's music to a canner's ears!

🧄 Golden garlic jelly — a taste of entrepreneurial success!
✨ Pro Tips for Perfect Garlic Jelly
- Use fresh garlic: Fresh, high-quality garlic makes all the difference in flavor.
- Don't skip skimming: Removing foam ensures a clear, beautiful jelly.
- Test for set: The plate test is your best friend for perfect consistency.
- Adjust heat: Add red pepper flakes for a spicy version — start with a pinch and add more to taste.
- Label properly: Include the date and flavor on your jars for easy identification.
🍽️ Ways to Enjoy Garlic Jelly
On Toast
Spread on warm toast or baguette slices for a savory-sweet treat.
With Cheese
Pair with cream cheese, goat cheese, or brie for an elegant appetizer.
Glaze for Meat
Use as a glaze for roasted meats, chicken, or pork for a sweet and savory finish.
Gift Giving
Package in pretty jars with ribbons for a unique, homemade gift.
❓ Frequently Asked Questions
❓ Can I use pre-minced garlic?
Fresh garlic is highly recommended for the best flavor. Pre-minced garlic may contain preservatives that affect the taste.
❓ How long does garlic jelly last?
Properly canned and stored in a cool, dark place, it lasts up to 1 year. Once opened, refrigerate and use within 2-3 weeks.
❓ Can I reduce the sugar?
The sugar is essential for the jelly to set properly. If you want a less sweet version, you'll need to use a low-sugar pectin and follow its specific recipe.
❓ Why is my jelly cloudy?
Cloudiness can be caused by not skimming foam or not straining the garlic infusion properly. Make sure to strain well and skim thoroughly.
❓ Can I make a spicy version?
Yes! Add red pepper flakes to taste for a spicy kick. Start with ½ teaspoon and adjust from there.
❓ Can I sell garlic jelly I make at home?
Yes, many entrepreneurs start with home kitchens. Check your local cottage food laws and regulations for selling homemade goods.
📄 Printable Recipe Card
╔═══════════════════════════════════════════════════════════════════════╗
║                    SCRUMPTIOUS GARLIC JELLY                           ║
║              Sweet, Savory, and a Market Favorite                     ║
╚═══════════════════════════════════════════════════════════════════════╝

YIELD: 6-8 half-pint jars | TIME: 45 minutes

INGREDIENTS:
- 2 cups garlic cloves (peeled, minced)
- 4 cups water
- 1 cup apple cider vinegar
- 6 cups granulated sugar
- 1 package (3 oz) liquid pectin
- 1 tbsp lemon juice
- Optional: red pepper flakes

INSTRUCTIONS:
1. Simmer minced garlic in water for 10 minutes.
2. Strain garlic infusion into clean saucepan.
3. Add vinegar and sugar. Bring to rolling boil.
4. Add pectin and lemon juice. Boil 1 minute.
5. Skim foam. Test for set point.
6. Ladle into sterilized jars (¼" headspace).
7. Process in water bath 10 minutes.
8. Cool 12-24 hours. Check seals.

"Behind every thriving business venture lies the
determination, creativity, and unwavering spirit
of successful entrepreneurs." 🧄
🧄 You May Also Like
© CanningRebels — Scrumptious Garlic Jelly | A Market Success Story









Comments