
Culinary Adventures Unleashed: From Homemade Caramel Coffee Creamer to Sustainable Savings

If you find yourself spending a fortune on store-bought flavored coffee creamers, it's time to take matters into your own hands and create a delectable homemade version.
In this recipe, we'll unveil the secrets to making a rich and creamy caramel coffee creamer that rivals its expensive counterparts. Not only will you save a significant amount of money, but you'll also have the satisfaction of knowing exactly what goes into your morning cup of joe. Get ready to elevate your coffee-drinking experience with this cost-effective and indulgent delight.
Related: Homemade Caramel Coffee Creamer: Indulgent Bliss in Every Sip
Recipe:
Ingredients:
- - 6 cups half and half
- - 6 cups milk
- - 2 cups sugar
- - 4 (12 ounce) jars caramel topping
- - 2 teaspoons vanilla extract
Related: Indulge in Homemade Coffee Bliss: Irresistible Pumpkin Spice, Italian Sweet Cream, and Coconut Cream Coffee Creamers
Instructions:
1. Heating the milk mixture:
- - In a medium saucepan, heat the half and half and milk over medium-high heat until hot, but not boiling. Stir occasionally to prevent scorching.
2. Adding the sugar:
- - Once the milk mixture is hot, add the sugar and stir until it is fully dissolved and well combined.
Related: A Sip of Sweet Delight: Homemade Brown Sugar Cinnamon Coffee Creamer
3. Incorporating the caramel:
- - Add the caramel topping to the saucepan and whisk vigorously until the mixture becomes smooth and creamy. Ensure that the caramel is fully incorporated.
4. Infusing with vanilla:
- - Remove the saucepan from the heat and add the vanilla extract. Stir well to combine and enhance the flavor.
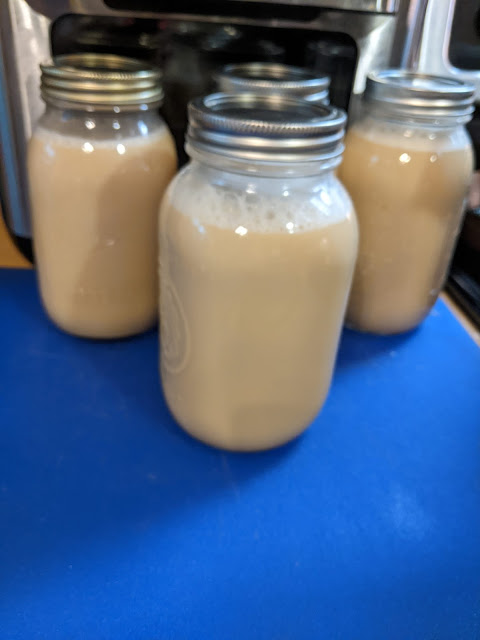
5. Storing the creamer:
- - Pour the homemade caramel coffee creamer into a container or containers of your choice.
- - Refrigerate the creamer until you are ready to use it, as it needs time to cool and set.
- - The creamer can be stored in the refrigerator for up to 4 weeks, allowing you to enjoy its creamy goodness for an extended period.
Related: Homemade Nacho Cheese Sauce: A Flavorful Delight for Cheese Lovers
6. Canning the creamer (optional):
- - If desired, you can preserve the homemade caramel coffee creamer by canning it.
- - Follow the instructions provided with your pressure canner for proper usage and safety precautions.
- - Pour the creamer into sterilized canning jars, leaving appropriate headspace.
- - Process the jars in the pressure canner for 25 minutes for quart-sized jars and 20 minutes for pint-sized jars.
- - Once the processing is complete, carefully remove the jars from the canner and allow them to cool before storing them in a cool, dark place.
With this homemade caramel coffee creamer recipe, you can bid farewell to expensive store-bought options and revel in the joy of crafting your own indulgent delight.
By combining simple ingredients and following a few easy steps, you'll create a rich and creamy caramel creamer that adds a touch of luxury to your morning coffee. Not only will you save a significant amount of money, but you'll also have the freedom to customize the flavor to your liking. So, savor every sip as you enjoy the cost-effective and flavorful journey of homemade caramel coffee creamer.
Similar: Homemade Creme Brûlée Coffee Creamer: A Delicious Canned Recipe


.png)

Comments
What lb pressure do you can at?
ReplyDeleteUse the pressure for your altitude.
DeleteWhat means half and half?
DeleteCan this be water bathed? I don't have a pressure canner
ReplyDeleteAccording to the canning experts at Ball, milk should never be canned. Even *if* there were no milk in the recipe, I don’t see anything that would bring the pH to a level appropriate for canning. Rather, this advice looks like it was posted by someone who knows nothing about canning and just threw this in. This is a dangerous recipe. Anyone reading this PLEASE DO NOT CAN THIS! It could make people very sick!
ReplyDeleteI was thinking the same thing. You could probably freeze it, but I wouldn't can it, not milk.
DeleteNope. PH is a factor when water bathing. Pressure canning is for low acid canning. Quality (curdling) is the issue, not safety.
DeleteThe above negative comment is stupid. The Amish and Mennonites have canned for years. Her Mitch her rules. Bye Felicia ⬆️
ReplyDeleteWhat should not be pressure canned?
DeleteProcessing in a pressure canner, water bath, or atmospheric steam is not suitable for dairy products. Instead freeze dairy products. Dairy foods are low acid and support the growth of Clostridium botulinum spores at room temperature. https://extension.psu.edu/foods-that-are-not-safe-to-can#:~:text=Processing%20in%20a%20pressure%20canner,botulinum%20spores%20at%20room%20temperature.
This recipe is 🔥
ReplyDeleteCould I omit the sugar entirely if I am using 14oz jars of caramel topping instead of 12 oz jars ?
ReplyDeleteIf milk should never be canned, then why have the powers that be been canning and selling canned milk in the stores for years?? It seems to me if they can do it, so can we. Where do you think they got the ideal I. The first place??
ReplyDeleteThe canned milk has preservatives, 🤮. Isn't this one of the reasons we're persevering ourselves?
DeleteWhy is this creamer pressure canned but the creme brulee recipe is water bathed?
ReplyDeleteIt might be because the sugar contain in the Creme Brulee is brown sugar and not white. Which means you dont want it to burn at a higher heat.
Delete